Project: Slippers
Sew Tunes: This American Life
Pattern: Simplicity (pattern 1958)
Fabric Used: Cotton and Faux Fur
New to Me: Slipper Soles and the Trimmings
Trips to Store: 2 times. Once to choose the fabric, then back again for the soles.
Loved One: My niece Kate, who is turning into such a lovely little lady. I miss her sew.
Day by Day…
Wednesday, November 23:
I see much sewing in my very near (4-day) future.
I hit Hancock Fabrics to pick up a pattern, fabric, and notions. I didn’t realize how much time I had spent in the store until I went to the cutting table. The Hancock’s team member had politely informed me that I had been shopping for two hours. Doh! I guess I spent a little too much time “curating” the fabric and trims for the slippers. But I think what I picked out is perfect for my sweet little 9 year old niece:
I also saw this fabric for the first time while shopping the aisles. Not appropriate for this project, since Kate probably doesn’t know what a “tape” is, but fun fabric nonetheless:
Thursday, November 24:
Before stuffing myself with copious amounts of turkey, I wanted to make a little movement with the slippers. I read through the instructions, cut and ironed the pattern pieces (2 total – slipper and lining), and then placed them and cut the fabric:
I do love this pattern. Not only are there different styles of slippers all in this one pattern (I’m making view D)…
…but each size (S-M-L) has its own pattern pieces. I am using the small (sizes 5 – 6.5), which Kate will most likely need to grow into. I am thinking these will make great gifts (depending on the outcome of this project). And no problem because all the sizes are still intact. Slippers galore.
Friday, November 25:
Once cut, there were four of each pattern piece – two for the right slipper, and two for the left.
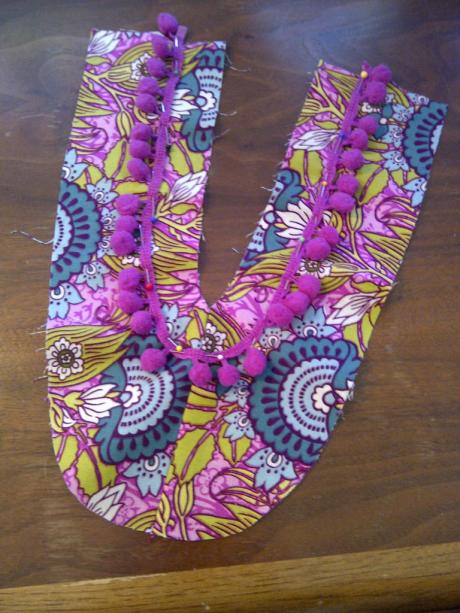
With the right sides together, I stitched the center seams of the slipper sections (1/2″ seam allowance). I then pinned the pom-pom trim along the placement line and stitched.
And then placed the ribbon over the top of the pom-pom trim and stitched.
I was feeling daring and used pink thread against the teal ribbon. The pom-poms made it a bit difficult to stitch in a straight line. I feel like I have regressed to the beginning weeks of this experiment.
Moving on…
With right sides together, I stitched the center back seam of the slippers. I then took the fur lining (right sides together) and stitched the center front and center back seams.
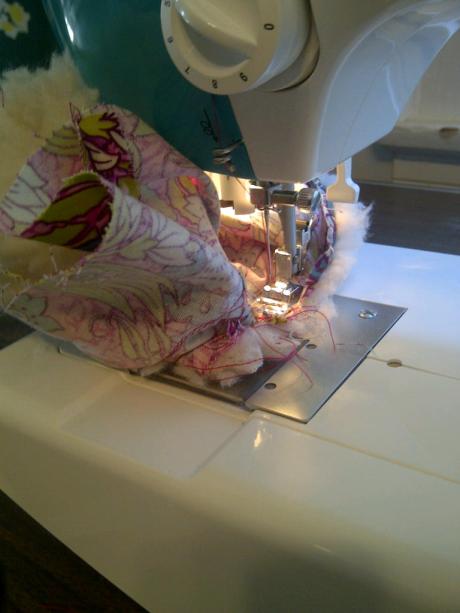
Time to attach the slipper sections to the lining sections. I was able to do a quick fix to remedy the crooked stitching in the above picture. When sewing all the layers together, I stitched along the top stitch line of the ribbon. The mistake was disguised as it was caught in the seam, but the awkwardness of sewing all the layers together wasn’t:
It reminded me of the clutch project.
I stitched along the top raw edges (the opening) and the bottom raw edges (where the sole will attach), added the bow, and here is what I ended up with:
Saturday, November 26:
The pattern requires pre-made soles, and picky is it. I need Boye Starting Point Suede Slipper Soles. I wasn’t able to find these soles locally, but really, how hard is it to make soles?!? A little bit of suede, a little bit of fur. I ran to the store to pick up a piece of suede.
And I am back. I took the slipper pattern piece and traced it onto the backside of the suede:
I then traced an outer line, doubling the seam allowance to allow for the suede to cover the stitch line on the slipper:
And then I sewed in the fur:
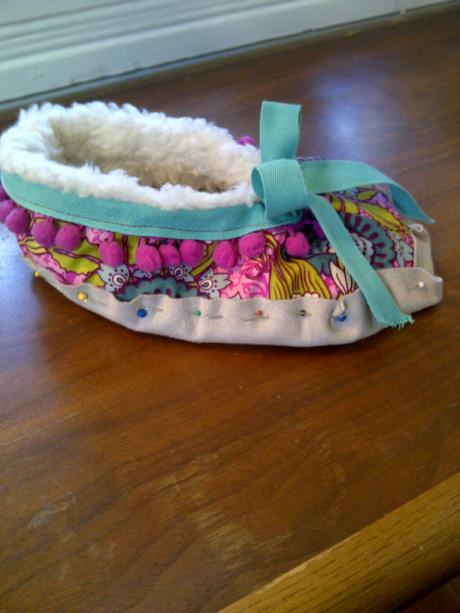
And here is my engineered sole attached by pins to the slipper. I had to cut the suede as I went, as the original piece was just a little too big.
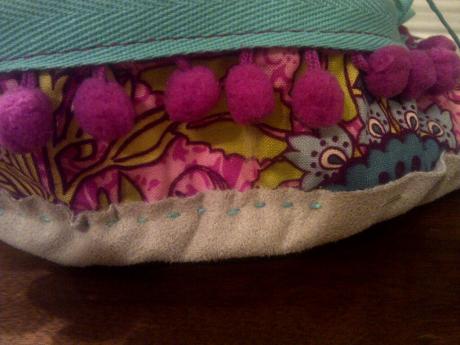
And I didn’t have to worry about hemming the suede before attaching it. Suede has a very clean (raw) edge once cut:
Now it’s time to attach the soles to the slippers using embroidery thread. As I stitched, I was sure to catch the fur that was stitched onto the sole as to avoid holes that Kate’s little toes can get stuck in.
Wow, this is a lot of work. Maybe pre-made soles aren’t such a bad idea. I am going to finish up this slipper, then place an order online for some Boye soles, and test it on the other slipper.
I will keep you posted. Until then, sew on…
Project Wrap-up
Sew Happy:
- The tape fabric made me happy, so much so that I went back to pick up just enough to make a dish towel. A little diversion from the slipper project:
Not Sew Happy:
- I wish I could have found the pre-made soles locally. I don’t want to lose momentum.










Beautiful slippers, Jenn! They look super comfy.
Thanks, Crystal!
I would like to order a pair for my b-day please. xo